
Last updated November 17, 2026
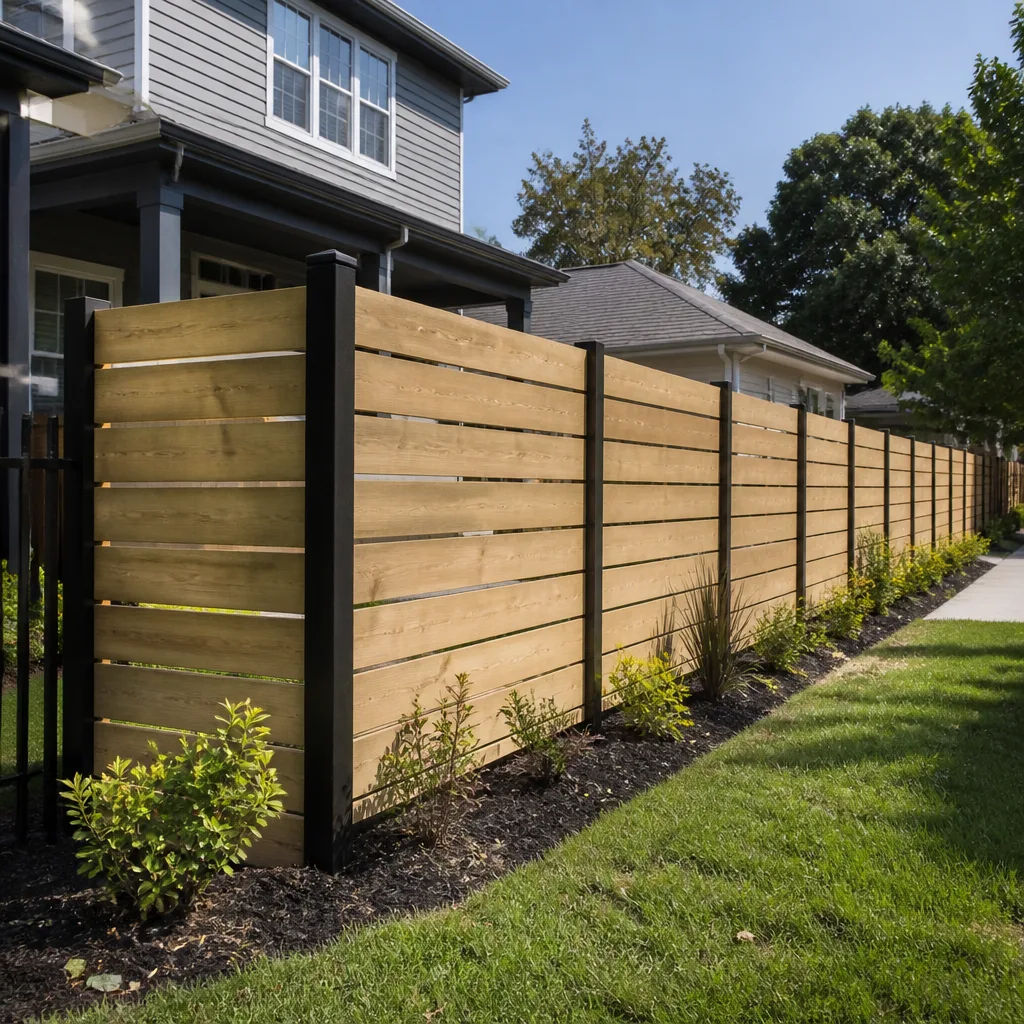 Fence
 Kitchen remodeling
 Bathroom remodeling
 Home additions & ADU
 Roofing
 Windows & doors
 Driveway & pavers
Free written scope consultation - allowances, timeline, and change-order rules on paper before a single trade is scheduled
Fence Installation Maintenance Schedule: What to Do and When
The number one fence maintenance mistake in South Florida isn’t neglect. It’s doing the right tasks at the wrong time. Specifically: pressure washing a wood fence in mid-July, when the humidity sits above 85% and the afternoon thunderstorm rolls in before the boards have any chance to dry. You scrub off the mildew, drive moisture deep into the grain, and the sun bakes the surface shut before the interior ever dries out. That’s how a fence that should last two decades starts cupping and graying in year three. In The Hammocks, we see this constantly. This guide gives you a material-specific calendar built for our climate, so you know what to do, and exactly when to do it.
Quick Answer
A South Florida fence needs inspection four times a year (with a dedicated post-hurricane-season structural check in November), wood staining and sealing every 24 to 36 months applied during the dry winter window, vinyl cleaning every spring, and gate hardware lubrication every 60 to 90 days. The schedule looks different here than anywhere else in the country because the threats are different here: year-round humidity, salt air, UV intensity, and six months of storm season. Do the tasks in the right season and a quality fence holds its structure and finish for 20 years. Do them at the wrong time and you’ll be replacing panels within seven.
Styles & brands we work with
- Kitchen remodeling
- Bathroom remodeling
- Home additions & ADU
- Roofing
- Windows & doors
- Driveway & pavers
- Fence
Table of Contents
- Your Year at a Glance: The South Florida Fence Calendar
- The Month-by-Month Maintenance Schedule
- Material-Specific Maintenance: Vinyl, Aluminum, Wood, and Chain Link
- Post-Hurricane Season Inspection Protocol
- Treating Wood Fencing in South Florida Humidity
- Gate Hardware Maintenance
- What Voids a Fence Warranty and What Keeps It Active
- Common Mistakes to Avoid
Your Year at a Glance: The South Florida Fence Calendar
Standard national fence-care advice assumes four seasons: freeze, thaw, spring growth, autumn dieback. The Hammocks gets two seasons that matter: the dry window from roughly November through April, and the wet season from May through October. Every maintenance task you perform should be scheduled around that split, not around a generic “spring cleaning” template that was written for Ohio.
Here’s the annual rhythm we recommend for any fence in The Hammocks and the surrounding communities:
- November through February: This is your heavy-work window. Stain and seal wood, prime and repaint, replace damaged pickets, tighten and align posts. Low humidity and 5 to 6 hours of dependable dry time per day make these tasks actually work.
- March and April: Deep-clean vinyl and aluminum, inspect hardware, prep gates. Apply UV protectant to vinyl. You want a clean surface going into wet season, not one carrying six months of accumulated grime into the rain.
- May through October: Inspection and light maintenance only. No staining, no pressure washing wood, no major repairs unless something is actively failing. This is the season for the 60-day hardware lube cycle and after-storm walk-arounds.
- Immediately after any named storm: Full structural inspection, no exceptions, even if the fence looks fine from the driveway.
For homeowners planning a full replacement rather than upkeep, the timing is worth thinking through too. Installing a fence in The Hammocks during the dry season means the wood has a better chance to acclimate and the posts set in soil that isn’t saturated. If you’re weighing a fresh install, our Fence Installation in The Hammocks page covers material selection and permit details for this market.
The Month-by-Month Maintenance Schedule
If you want a checklist you can actually put on the refrigerator, here it is. This is the exact sequence we walk our own customers through when they ask what a realistic maintenance year looks like in The Hammocks.
- January: Inspect every post for softness at the soil line by pressing firmly with a screwdriver handle. Touch up any bare wood with stain. Clean out debris from fence-line drains and swales.
- February: Full wash and stain on wood fences, if due. This is the last reliable month for a two-day dry before application cures.
- March: Deep-clean vinyl and aluminum. Check all gate hinges and latches. Re-tighten post caps and finials that worked loose over the dry season winds.
- April: Pre-hurricane-season hardware check. Verify gate alignment, confirm hinge screws bite solidly, test latches for positive engagement. Photograph the entire fence line and store it in the cloud.
- May: Lubricate all moving hardware. Trim back vegetation that’s touching panels and trapping moisture.
- June: Mid-season visual walk. Look for new warping, gaps, or rust bloom. Note anything that needs fixing once dry season returns.
- July: Hardware lubrication cycle. Inspect post bases after heavy rain events. No pressure washing of wood.
- August: Peak storm season. Keep the yard clear of loose items that could become projectiles against the fence. Log any storm impacts.
- September: Hardware lubrication cycle. Check for ground erosion around post bases after repeated rain.
- October: Final wet-season inspection. Clear gutters and downspouts so water isn’t dumping along the fence line.
- November: Post-hurricane-season structural inspection (see the dedicated protocol below). This is non-negotiable in The Hammocks.
- December: Begin any deferred repairs, restain as needed, and photograph the completed state for warranty records.
Notice what’s missing: nothing here asks you to lift a pressure washer in summer. That single change in timing will do more for your fence’s lifespan than any product you can buy.
Material-Specific Maintenance: Vinyl, Aluminum, Wood, and Chain Link
“Fence maintenance” is not one procedure. Each material fails differently in our climate, which means each material needs a different inspection point and treatment window. Here’s how the four most common fence types in The Hammocks actually break down.
Vinyl Fencing
Vinyl is the low-maintenance option, but “low” is not “none,” and our UV load is brutal on it. Untreated vinyl will chalk and yellow within six to eight years under South Florida sun. Clean it annually in late winter with a soft brush and a mild soap solution, never a stiff-bristled brush or an abrasive pad, which scratches the surface and gives dirt a place to lodge.
- Inspection points: Look at post caps and top rails for hairline cracks, since these are the UV-exposed surfaces. Check the soil line for posts that have shifted.
- Failure mode here: Impact cracking from flying debris during storm season, plus yellowing from sun exposure.
- Preventive action: Apply a UV protectant designed for vinyl every two to three years. Follow the manufacturer’s approved product list.
Aluminum Fencing
Powder-coated aluminum handles our humidity well because there’s no organic material to rot, but salt air and industrial fallout will still attack any place the coating gets nicked. Walk the fence twice a year and touch up chips with matching touch-up paint before corrosion starts. Wash with fresh water every three to four months to remove salt residue.
- Inspection points: Every connection point, weld, and fastener. Aluminum welds are where hairline cracks first appear after wind flex.
- Failure mode here: Galvanic corrosion where aluminum meets steel hardware, plus coating chips from yard equipment.
- Preventive action: Replace any galvanized or steel fasteners with stainless when you find visible corrosion.
Wood Fencing
Wood is the highest-maintenance material in South Florida and also the one where maintenance pays off the most. Our humidity, termite pressure, and sun combine to age wood faster than almost anywhere in the country. Your wood fence needs an inspection for rot, insects, and fastener back-out every three months, and full stain or seal every 24 to 36 months.
- Inspection points: Soil-line post bases, board ends, and the side of the fence that gets less sun, which stays wet longer and rots first.
- Failure mode here: Fungal rot at ground contact, termite damage (subterranean termites especially love the moisture trap at the post base), and UV graying on the sunny side.
- Preventive action: Stain and seal on the dry-season schedule described below, and replace any board showing softness immediately rather than waiting for the next cycle.
Chain Link
Chain link is the most forgiving material in this market, but the tension wires loosen over years of thermal expansion and contraction, and vinyl-coated chain link can crack at coating stress points. Check tension at each terminal post annually. Wash the fabric with fresh water to keep salt residue from accelerating rust on any exposed metal.
- Inspection points: Terminal posts, tension bands, and turnbuckles. Also look at the bottom rail for rust bloom where soil and moisture contact.
- Failure mode here: Coating failure leading to rust, plus sagging fabric from loosened tension.
- Preventive action: Tighten turnbuckles annually and touch up any coating nicks with matching paint.
Material choice itself is the first maintenance decision. If you’re starting from scratch and want to understand how vinyl, aluminum, and wood compare in our market, that’s the conversation our Fence Installation in The Hammocks team has with homeowners regularly, and it’s worth having before you commit to a material you’ll be maintaining for the next 20 years.
Post-Hurricane Season Inspection Protocol
Every homeowner in The Hammocks should run this inspection in late November, whether or not their fence shows visible damage. Wind stress is cumulative. A fence that survived a season of 50-mph gusts looks fine from ten feet away and has cracked welds or loosened hinge screws underneath. Use this as your post-season checklist:
- Walk the entire fence line from both sides. Look for lean, twist, and any panel that’s deflected out of plane. A post that’s leaning 5 degrees is a structural warning.
- Test post stability by hand. Grab each post near its base and try to rock it. Any movement at the ground line means the concrete footing has cracked or the soil has eroded.
- Inspect all hardware. Hinges, latches, brackets, and screws. Look for fasteners backed halfway out, which is very common after wind flutter. Replace, don’t just re-tighten, any fastener that’s visibly deformed.
- Check post caps and top rails for cracks or missing pieces. Missing caps are the direct entry point for water into the post interior.
- Look for impact damage. Yard debris, palm fronds, and neighbors’ items fly in storms. Inspect each panel for cracked pickets, bent fabric, or coating damage.
- Check the ground along the entire line. Storm runoff erodes soil away from post bases. If you can see concrete, the post is under-supported and needs backfill.
- Photograph everything and store the images with your warranty paperwork.
In our experience working throughout The Hammocks, roughly one in three fences that “look fine” after hurricane season has at least one post with compromised footing. Catching that in November means a $200 repair instead of a full section replacement the following August when a routine storm pushes it over.
Treating Wood Fencing in South Florida Humidity
Wood treatment in The Hammocks is a chemistry problem combined with a weather problem. Most fences fail not because the wrong product was used, but because the right product was applied at the wrong time, under wrong moisture conditions, and cured in the wrong climate. Here’s the correct approach.
The right product for this climate
For South Florida wood fences, you want either an oil-based penetrating stain or a high-quality water-based acrylic stain with UV inhibitors. What you don’t want is a film-forming clear surface sealer, which traps moisture inside the wood in our humidity and peels within 18 months. Penetrating products soak in and breathe; film-forming products fail with blistering that’s difficult to strip and re-do. If your existing fence has a film-forming finish that’s peeling, you’ll need to strip it before recoating, and that’s a job best done in the dry window.
The application window
Stain and seal work must be done between November and April. Specifically, you need a two-to-three-day window with no rain forecast, humidity below 70% (which usually means a clear, dry cold front has moved through), and temperatures between 50°F and 85°F. That’s a real window in The Hammocks, but it’s narrow, and it’s why anyone who tells you “we’ll get to your stain job whenever” isn’t being straight with you. Wood moisture content is the other variable. Never apply stain to freshly installed pressure-treated wood for at least four to six weeks, because the mill-applied treatment needs to off-gas and dry first.
Reapplication intervals
In our climate, plan on staining every 24 to 36 months. You can usually stretch to 36 on the shaded side of a fence and should plan on 24-month cycles on full-sun exposures, specifically south- and west-facing panels. Water-soluble stains need reapplication sooner than oil-based, but they’re easier to apply and safer to handle. Test whether a fence needs another coat by splashing a cup of water on a dry section: if the water beads, the finish is still intact. If it soaks in immediately, it’s time to recoat.
Gate Hardware Maintenance
The gate is where almost all functional fence failures happen, and yet it’s the part most homeowners neglect longest. A gate is a moving assembly attached to a static structure, and it takes the full force of every slam, every wind gust, and every seasonal change in wood moisture. The right hardware schedule prevents 80% of the repair calls we get in The Hammocks.
Lubrication schedule
Lubricate hinges, latches, and any moving connection every 60 to 90 days. That means four to six times per year. In The Hammocks, because of our humidity and salt air exposure (even at a couple miles from the coast), you should lean toward the higher end of that range. Use a spray silicone or a dry PTFE lubricant, not a heavy grease. Grease attracts dirt in our sandy environment and turns into grinding paste inside the hinge. Spray, work the hinge through its full arc a few times, then wipe off any excess.
Hinge inspection points
- Check the hinge-to-post fasteners and the hinge-to-gate fasteners separately. Wind flutter almost always loosens one before the other.
- Look for rust bloom on the hinge pin. That’s your cue to clean and relube immediately.
- Test for sag by opening the gate to 45 degrees and releasing it. A well-adjusted gate stays where you put it. A sagging gate swings shut on its own.
- On self-closing gates, check that the spring returns smoothly without slamming. A slam is a hinge problem in the making.
Latch adjustment procedure
- Close the gate fully and look at how the latch sits relative to its strike plate. Any more than 1/8 inch of misalignment will cause the latch to hang up.
- If the gate is dragging, tighten the top hinge first, which usually lifts the outer edge. Only adjust the bottom hinge if top adjustment isn’t enough.
- Wobble in the gate frame itself means a weld or bracket has failed. That’s a structural repair, not a hardware adjustment.
- After adjusting, open and close the gate five times to confirm the latch engages cleanly with no upward or downward pressure required.
- Do the same on the ground: verify a gate isn’t dragging on the ground after heavy rain. Wood gates expand in our humidity and will often rub through their opening clearance. Plan for 1/2 to 3/4 inch clearance at the bottom specifically because of that seasonal swing.
Gate hardware is also a security item, not just a convenience one. A fence whose gate latch no longer engages is a fence that doesn’t secure a pool area, a yard with pets, or a property boundary. If your gate is failing and you’re considering a replacement assembly, our Groundwork Construction Co. of The Hammocks home page is a good starting point for understanding what a full-scope repair looks like.
What Voids a Fence Warranty and What Keeps It Active
Fence warranties are shorter and narrower than most homeowners expect, and the documentation requirements are the part almost nobody keeps. Vinyl warranties typically run 20-plus years on the shell, with much shorter coverage on hardware and gate assemblies. Wood fence warranties are usually measured in single digits and often exclude rot entirely. Aluminum can run 15 to 20 years on the powder coat. Every one of those warranties has conditions attached, and if you violate them, the warranty is void whether or not you acted in good faith.
What voids a warranty
- Unauthorized cleaning products. Bleach, acetone, and abrasive cleaners are near-universal warranty exclusions on vinyl. Use only manufacturer-approved cleaners.
- Power washing above safe pressure. Most vinyl and aluminum warranties specify a maximum pressure, usually around 1,500 PSI, and any damage from over-pressure washing isn’t covered.
- Painting a fence that wasn’t meant to be painted. Some vinyl and aluminum finishes are designed to be paint-free for the life of the warranty. Painting them voids that finish warranty.
- Unofficial modifications. Adding a trellis, hanging a gate from a post not rated for it, or cutting pickets voids structural coverage in most brands.
- Ground-contact rot. Many wood warranties exclude ground contact entirely, meaning you’re on your own if the failure is at the post base.
- Wrong fasteners. Mixing dissimilar metals (galvanized screws into aluminum posts, for example) causes galvanic corrosion, and that’s almost never covered.
- Failure to document. This is the one that kills valid claims. Manufacturers require proof of installation date, installation contractor, and in many cases proof of maintenance.
What keeps a warranty active
The documentation you actually need: the original invoice with install date and materials, the warranty registration card (many require it be filed within 30 to 90 days of install), photographs of the fence line at installation and after each major maintenance cycle, and receipts for any products used in maintenance. Store all of it digitally. If you sell the house, that packet is also proof the fence has been maintained, which matters at inspection. When you purchase a fence from a qualified installer, part of what you’re paying for is that documentation trail. Our Fence Installation in The Hammocks service handles that registration and handoff as part of the project.
Common Mistakes to Avoid
- Pressure washing wood in summer. Our humidity doesn’t give the boards enough dry time between washes and afternoon storms, so moisture drives deep into the grain and can’t escape before the sun seals it under the surface. Do this and you’ll see cupping, warping, and premature gray within a season.
- Sealing newly installed pressure-treated wood too early. Fresh pressure-treated lumber needs four to six weeks to off-gas and dry before it can accept a stain. Seal too soon and the finish will flake as the wood continues to dry under it.
- Using film-forming sealers in a humid climate. A clear surface sealer that forms a film traps moisture in the wood in The Hammocks. It looks great for one season and then peels. Penetrating stains instead.
- Skipping the post-season inspection because the fence looks fine. Wind stress is cumulative and hidden. The leaning post that finally falls over in a July storm was almost always compromised the previous November.
- Lubricating gate hardware with grease. Heavy grease attracts our sandy soil and turns into an abrasive paste inside hinges. Spray silicone or dry PTFE, every 60 to 90 days.
- Throwing away the warranty documentation. The most common reason valid warranty claims get denied in The Hammocks is missing paperwork. Photograph the entire fence on installation day and store the file.
- Letting vegetation grow against panels. Vines, hedge growth, and palm fronds against a fence trap moisture and keep the surface wet long after rain. Trim back 12 inches and you’ll see less rot, less mildew, and fewer failures.
See the difference
 Before
 After
 Before
 After
 Before
 After
When to Call a Professional
Some fence repairs are homeowner tasks: a loose hinge, a re-stain, a leaning picket. Others carry real structural risk and belong in the hands of a trained technician. Call a professional when a post moves at the ground line (the concrete footing is likely cracked and will need excavation and resetting), when you have a rot or termite problem that’s spread beyond a single board, when a fence is leaning as a whole system, when you’re replacing more than a few pickets and need the new ones to match the existing line, or when wind damage needs to be documented for insurance. If you’re not sure whether the issue is cosmetic or structural, it’s worth getting a trained eye on it before a minor repair becomes a full section rebuild. Groundwork Construction Co. of The Hammocks offers free estimates in The Hammocks – call (844) 761-9356 to schedule a walk-around.
Frequently Asked Questions
Once per year, and only in the November-through-April dry window. Pressure washing wood in summer traps moisture inside the boards and drives premature warping and rot. Even in the dry season, keep your pressure under 1,500 PSI and use a fan tip at a shallow angle. For vinyl and aluminum, pressure washing is fine year-round but should be done in the dry season so any trapped moisture behind the panels has time to dry before wet season returns. If you’re not sure of the right pressure for your specific material, call us at (844) 761-9356 for a quick answer – no charge and no pressure to hire anything.
In practice, no. Proper stain and seal work needs a two-to-three-day rain-free window with humidity under 70%, and during our wet season those windows are unpredictable at best. Even in a dry stretch, the afternoon humidity often rises past the point where oil-based products will cure correctly. Wait for the dry season cold fronts and you’ll get a finish that lasts three years instead of eighteen months.
Run the seven-step post-hurricane inspection covered above, with special attention to post stability at the ground line and any backed-out hardware. Don’t rely on visual appearance; wind stress is mostly hidden. Photograph the entire fence, document any damage, and reach out before storm-season repair demand fills everyone’s calendars. Our team is reachable at (844) 761-9356 any time – a live person answers, day or night.
Small repairs like a hinge replacement or one picket typically run $150 to $400 in this market. Post footing repairs or reinforcement generally land between $300 and $900, and a full section replacement runs $500 to $1,500 depending on material and length. If you’ve got a repair estimate in hand from another contractor and want a second look at it, our estimate is free. That’s a straight quote with a line-item breakdown, and the number you see is the number you pay. Call (844) 761-9356 for a walk-around.
Absolutely. The humidity, salt air exposure, and UV load all push the annual maintenance requirements higher than most of the country produces. Aluminum and vinyl tolerate The Hammocks climate with the least upkeep, treated wood needs a real maintenance commitment, and chain link sits in the middle. If you’re picking a material for long-term low maintenance and you’re within a couple miles of the coast, aluminum usually wins in this market. If you want the natural look and don’t mind 24-to-36-month staining cycles, quality wood is a solid choice.
Not if you perform the right maintenance with the right products. What voids a warranty is unauthorized cleaners, over-pressure washing, unauthorized paint, or modifications, plus failure to keep documentation. Read the warranty before your first maintenance task of the season and match your products to the manufacturer’s approved list. And keep photographing the fence at every major maintenance milestone – that folder is the entire difference between a warranty claim that pays and one that gets denied.
The Bottom Line
A fence in The Hammocks can hold its structure and finish for 20 years, or it can be visibly degraded and functionally compromised in seven. Same starting material, same neighborhood, same weather. The variable is whether the maintenance was done at the right time for our specific climate. Pressure-wash and stain in the dry window, not the summer. Lubricate gates every 60 to 90 days. Run the post-hurricane-season inspection in November whether or not the fence looks damaged. Keep your paperwork. That’s the entire discipline. Do it and your fence does its job for two decades.
If you’re ready for a free walk-around or you’re planning a new fence for the coming season, Groundwork Construction Co. of The Hammocks offers upfront pricing, background-checked technicians, and our 730-Day Done Right Promise – if it’s not done right, we make it right. Our estimates are free, our quotes are line-item, and our crews install to the same schedule we just described. Call (844) 761-9356 for a free estimate. A live person answers, any hour of the day or night.
Written by the team at Groundwork Construction Co. of The Hammocks.